Wednesday 6th of June 2018
A long while back I wrote a guide to using the free panorama software Hugin with World of Warcraft screenshots. This guide is basically just an updated version of that, only using Guild Wars 2 as the screenshot source since I don’t play WoW any more.
Get Hugin
Hugin can be downloaded from its SourceForge page: https://hugin.sourceforge.io/
Install it in the usual manner – the default options are fine.
Take some screenshots
Naturally you’ll want your graphics settings on the highest, even if you don’t normally play that way. You should also turn off your UI with Ctrl+Shift+H (by default), and turn your minipet off if you have one.
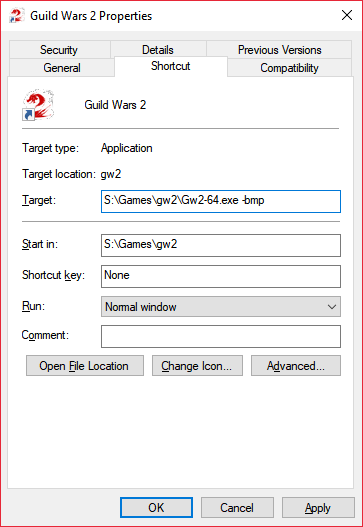
For best results you should modify your GW2 shortcut to tell the game to make screenshots in BMP format, rather than the default JPEG. Just add -bmp (with a space after the .exe bit) to the end of the Target box in the shortcut properties window, like so:
Next, if you haven’t already, enable First Person Camera:
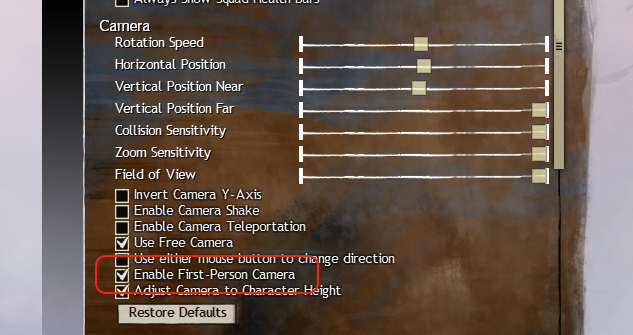
This keeps the position of the camera fixed, so moving your view only affects its rotation, and you don’t have your character model in the shots. You’ll notice also the Field of View slider is set all the way to the right. If you want a super-high-resolution panorama, set it a bit lower and take more screenshots.
(update: thanks to /u/Lishtenbird on Reddit for the reminder about this point)
If you have Post Processing on, you might also want to click on an NPC that will remain out of view so as to avoid randomly having NPCs in view getting the highlight outline.
Now, start taking screenshots! The key here is to make sure the parts of the scene overlap significantly in each image, and make sure to aim further into the corners than you think is necessary, lest you have blank spots there when it comes time to stitch the images together.
Import to Hugin
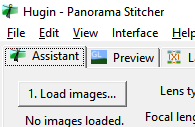
Once you’ve got all your nice big .bmp images, open Hugin if you haven’t already, and click the 1. Load images… button on the Assistant tab:
Select the relevant images from the Open dialog and click Open. You’ll be presented with a dialog like this:
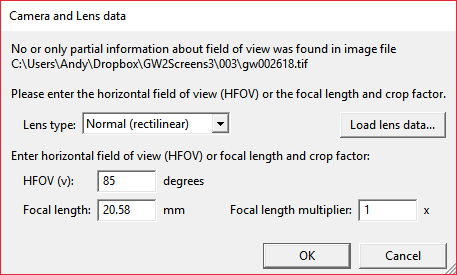
The only thing that matters here is the HFOV (v) box, which should be 85 if you have the Field of View slider set to maximum. I don’t know if this is completely correct, but it works perfectly well so it doesn’t matter too much.
Click OK and you’ll get something like this:
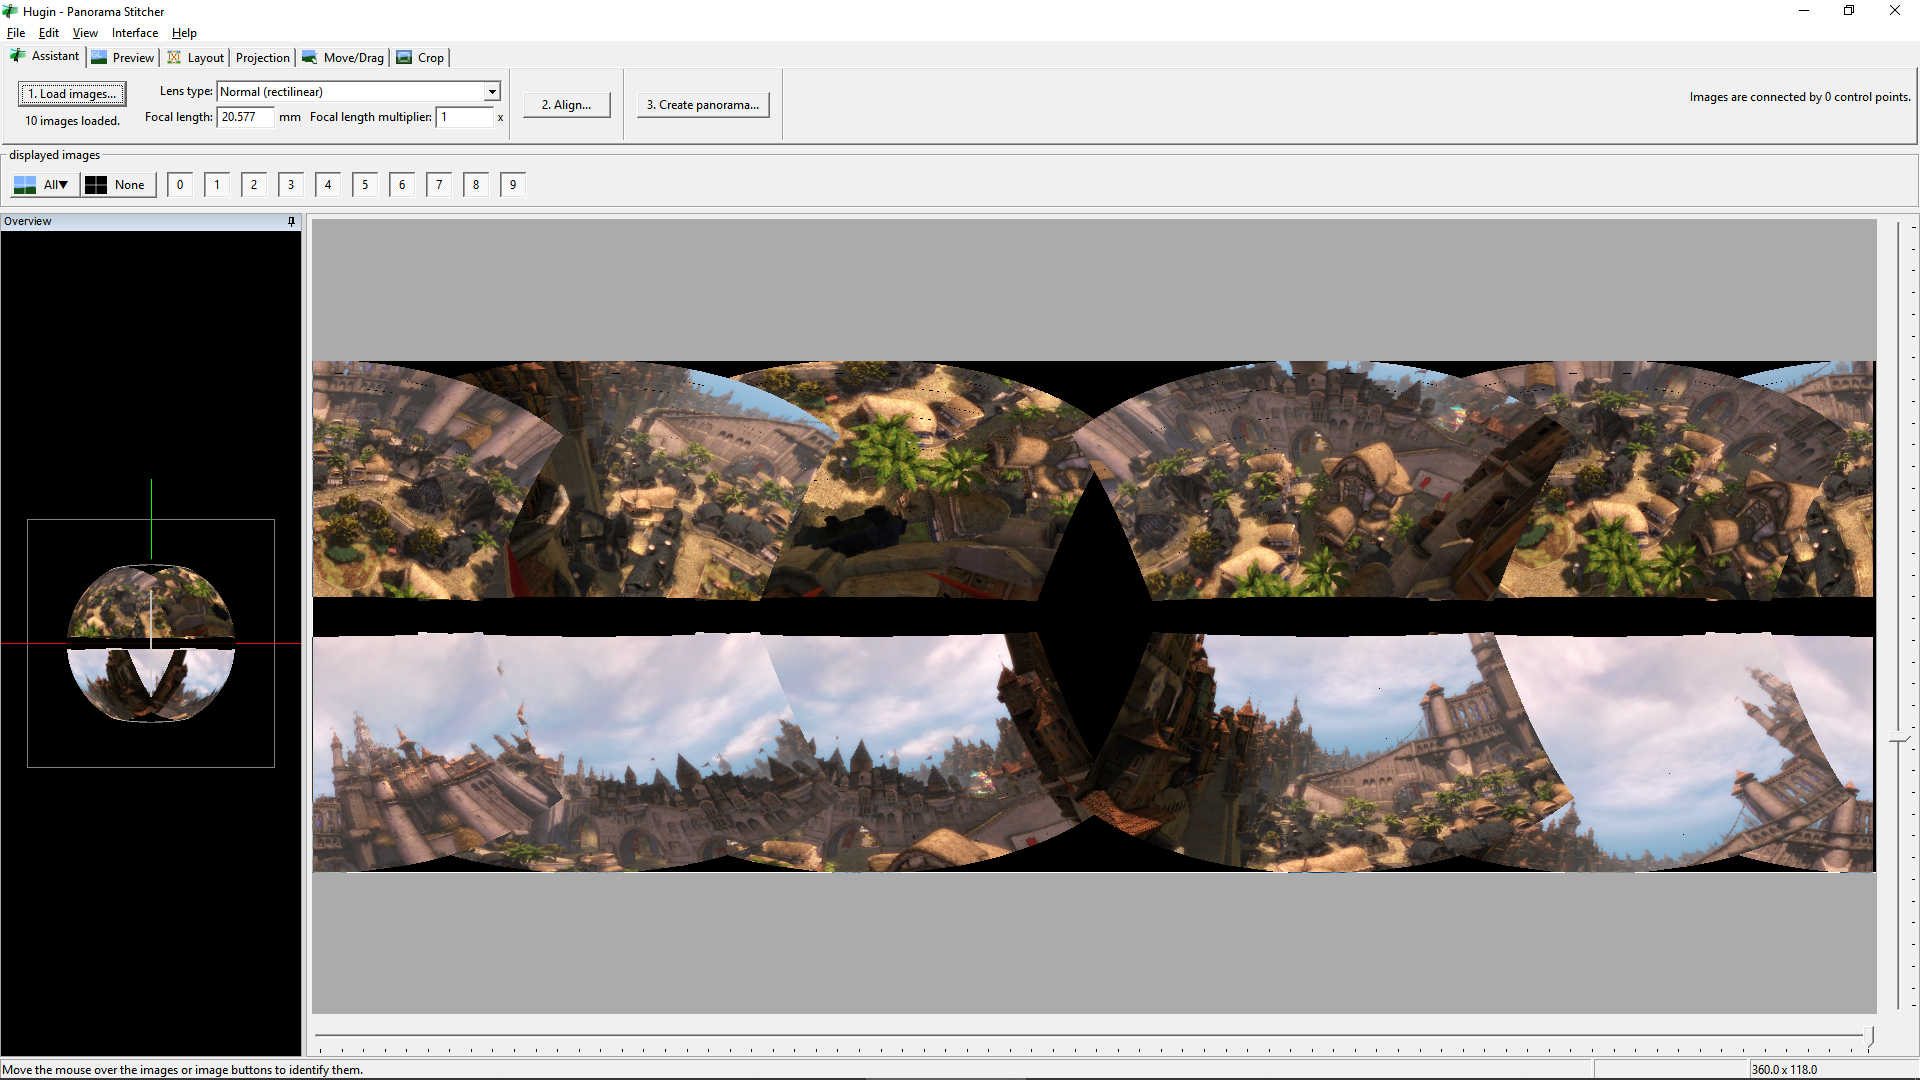
It looks broken! Don’t worry, the magic comes with the next step. Click the 2. Align… button, and a bunch of DOS-looking windows will appear and Hugin will analyse the images, looking for matching shapes and points, and align everything. Depending on the speed of your computer, the size of the screenshots, and how many you took, this can take quite a while.
Once it’s done, switch to the Move/Drag tab and click Straighten. You might then need to rotate the view so the correct part is in the middle. Click and drag with the left mouse button while holding Shift to ensure you only rotate about the vertical axis. Once the view’s more or less aligned, it should look something like this:
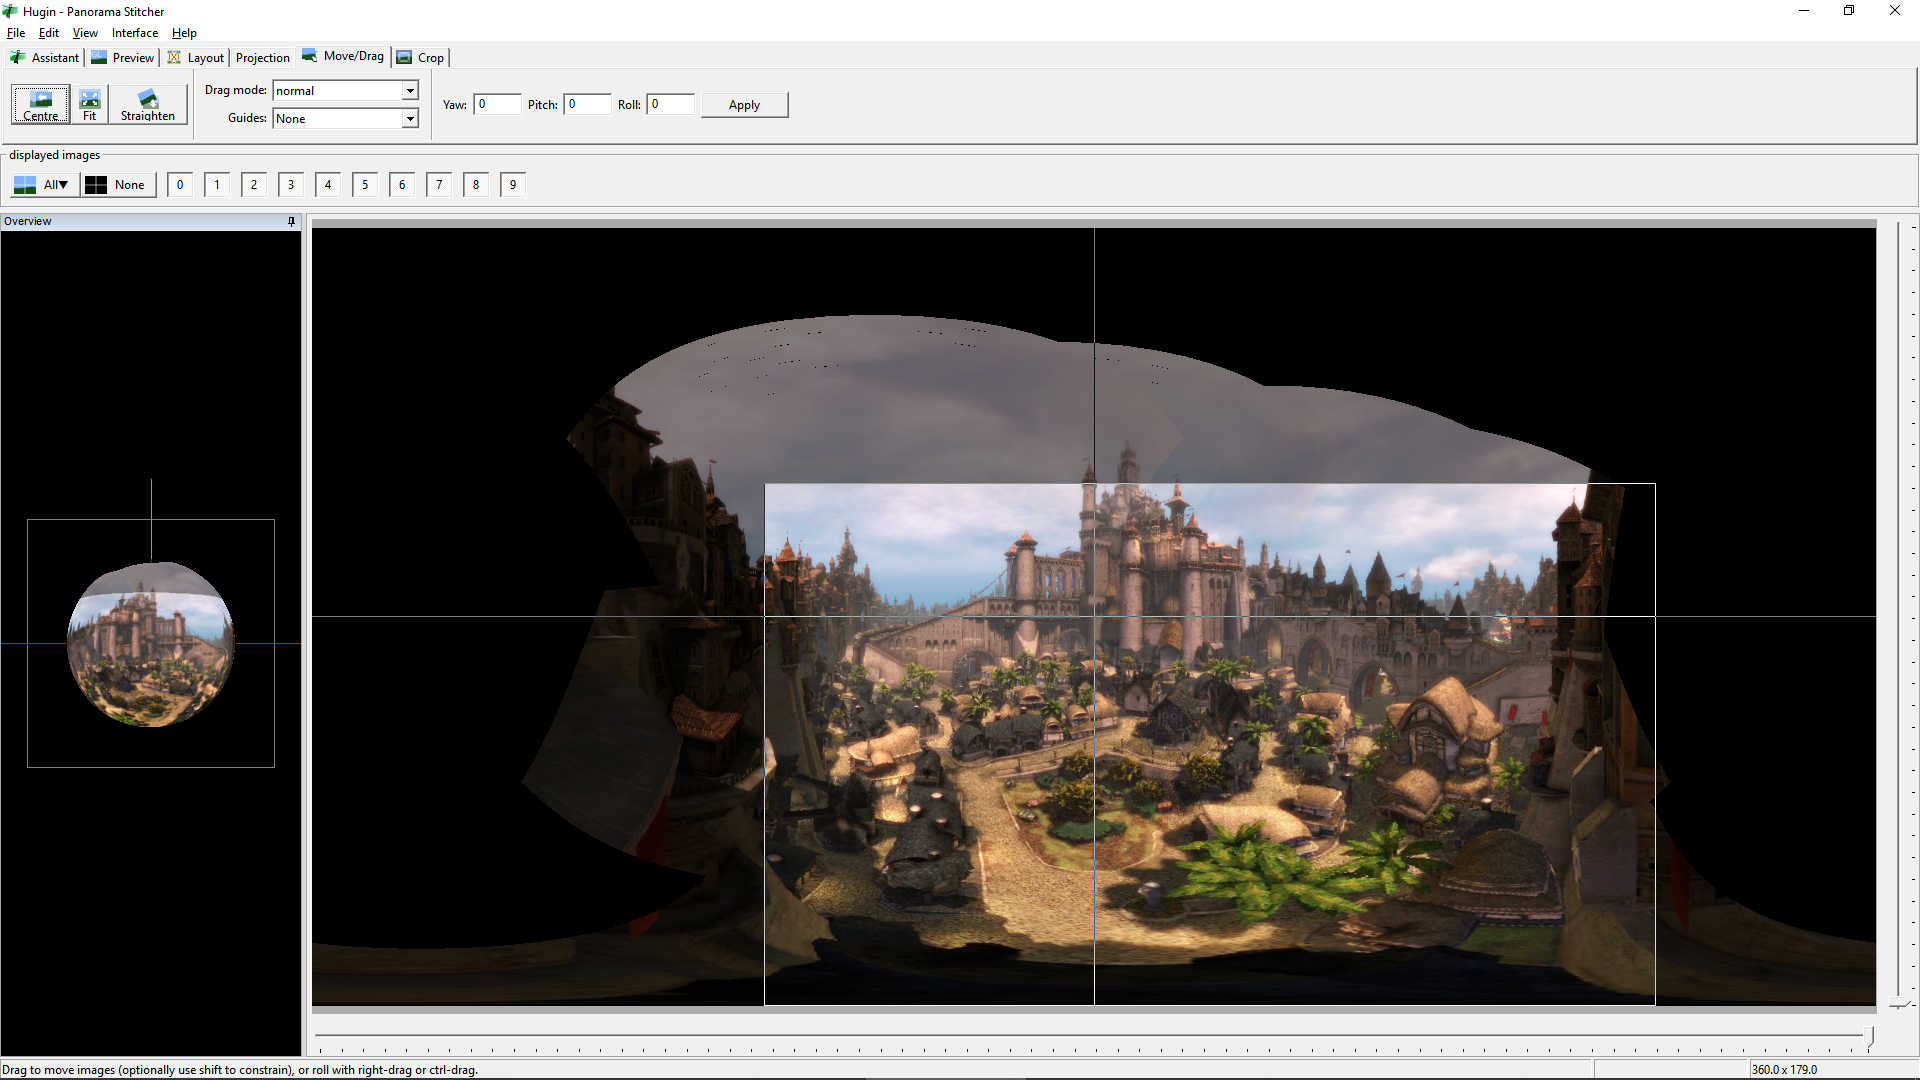
The default projection is called Equirectangular and it’s usually fine – it’s a good compromise between Rectilinear, which is the standard for camera lenses and in-game cameras, but can make things at the edges look super stretched, and Cylindrical, which doesn’t have the stretching problem so much on the sides, but makes things look weirdly tall sometimes. Feel free to try out different projection methods on the Projection tab.
Next you need to tweak the Crop, so you only get the part of the image you want, and don’t include any blank black areas. This is fairly self-explanatory – just switch to the Crop tab and drag the edges of the rectangle to fit. You might find you need to switch back and forth between this and the Move/Drag tab to line things up nicely.
Finally it’s time to render the full panorama image. If you haven’t already, I suggest saving your panorama project first, just in case Hugin crashes mid-render. Then, switch back to the Assistant tab and click 3. Create panorama…. You’ll get a dialog like this:
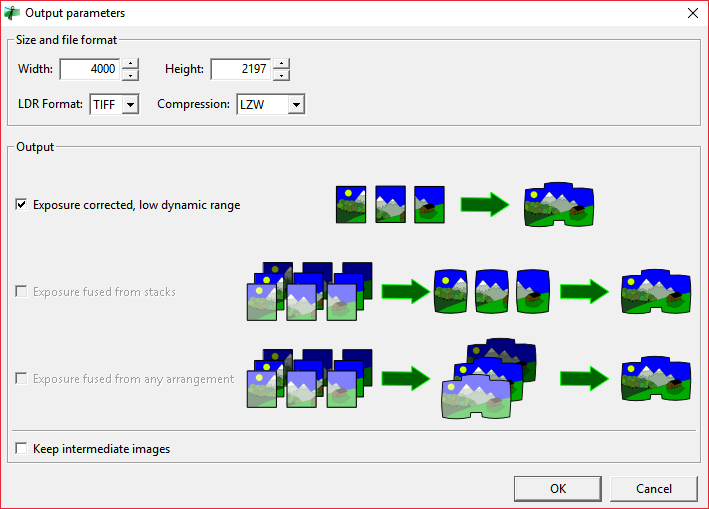
The only important setting here is how big you want the rendered image to be (in pixels). Remember that because it’s a combination of several source images, you can have an output image that’s far larger than the resolution you normally play the game at.
Click OK and choose a name for the rendered image – it defaults to the project name. Click Save then wait while Hugin renders the panorama. Here’s the one from the screenshots in this guide:
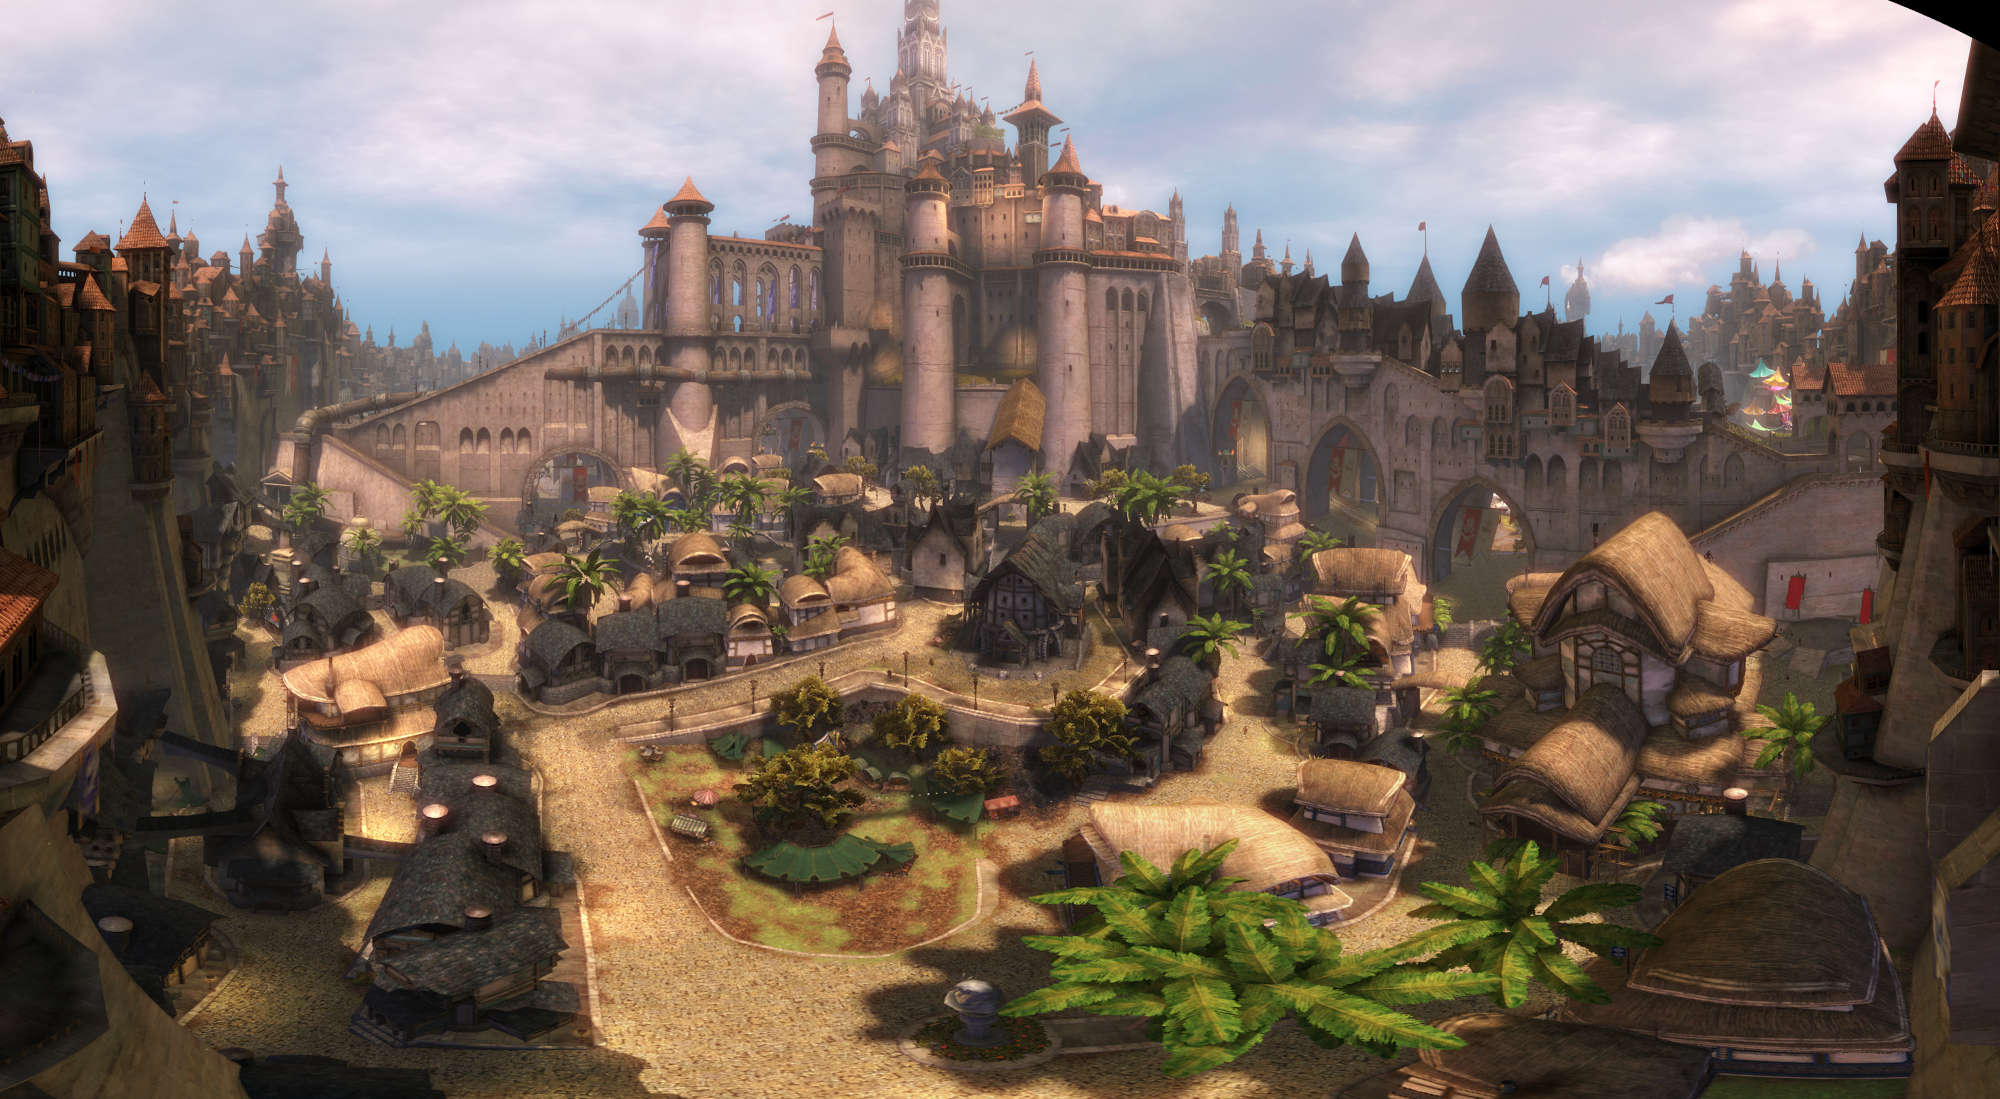
Remember how I said to aim further into the corners than you expect? Well, you can see the problems that can happen if you don’t, here – the upper-right has a lovely black triangle. Some clone stamp work in a photo editor can usually fix it, but ideally you want to avoid the issue in the first place.
Anyway, that’s all there is to it, enjoy!
No comments
Write a comment: