Thursday 17th of October 2013
Quick link: Hugin
Panoramas are cool – they show a much wider/taller view than it’s possible to capture in one shot, and do so in a way that doesn’t have the same weird rectilinear or fisheye distortion you get from regular wideangle or fisheye lenses.
Here’s an example of what I mean:

If you actually go to the instance and stand in the same spot, you’ll notice right away that the view isn’t nearly as wide as this.
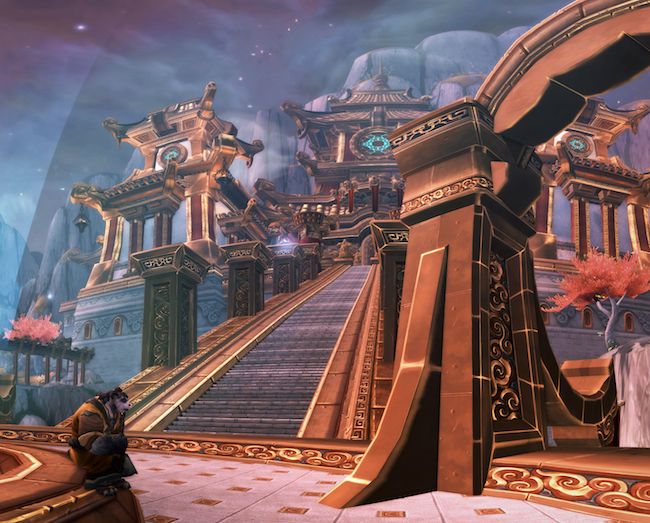
Here’s another example:

Again, if you go here, you’ll find that you can you can only see around one third of the picture at once.
To do this, I used a free panorama creation program for Windows called Hugin. It can be a bit crashy sometimes, but it does a good job.
Step 1: capture the parts
To build a panorama, you first need to take a series of screenshots that cover the angle of view you want to include. Obviously this gets complicated if there’s anything moving in your scene, but Hugin is able to compensate for small differences fairly well.
There are a few important things to remember when taking the source screenshots:
-
Don’t move: all images must be taken from the same position, otherwise they won’t line up properly.
-
Use first-person view: following on from the above, the only way to stop the camera position from changing when you rotate it is to zoom right in to first-person view (i.e. camera inside your character’s head).
-
Fill the corners: depending on the final projection, the corners of the image can end up pulled towards the centre quite a lot, so it’s best to point the camera further into the corners of the scene than you might initially expect.
Hugin comes with a pretty magical auto-stitcher, that examines your images for matching details while compensating for rectilinear perspective distortion. To do this most effectively, it needs a decent amount of overlap between the images; I find 50% or so works well.
Quality tip: by default, WoW screenshots are saved as pretty low-quality JPEGs, which can result in ugly colour banding in smooth gradients like skies. I recommend changing it to TGA format, which is uncompressed and so much higher quality (but it does take up much more disk space). To change, type this into the WoW chat box:
/console screenshotFormat tga
Step 2: import into Hugin
Once you have your source screenshots, fire up Hugin and import them:


Hugin will then ask you for the horizontal field of view for the images; some Googling reveals that for a 16:9 ratio fullscreen image, WoW’s HFOV works out to 84.4 degrees. If your monitor has a different aspect ratio, this might not work, although you could always try running WoW a 16:9 resolution; it won’t look great when you’re playing, as it won’t match the native resolution of your monitor, but the screenshots will come out fine.

The Lens type should be left as ‘Normal (rectilinear)’; the Focal length and Focal length multiplier boxes can be ignored.
Click OK and once Hugin’s loaded the images, it’s time for the interesting part.
Step 3: align and preview
On the first tab still, click the Align… button:

Hugin will then do a bunch of magic to analyse the images and automatically figure out how they align and overlap. This takes a while.
Once that’s done, save your pano project! As I mentioned earlier, Hugin is a bit unstable, and sometimes when I click the OpenGL Preview button right after doing the Align step, it crashes. That said, I’ve found that clicking the ‘normal’ preview button first, then closing that preview, allows the more flexible (and faster) OpenGL preview to open reliably.

In the OpenGL preview, you have a whole lot of things to twiddle:

The Layout tab can bascially be ignored – assuming Hugin worked its magic, the images will be properly aligned; you’ll be able to tell anyway if they’re not.
On the Projection tab, the control of most interest is the dropdown box that in the screenshot above says ‘Equirectangular’. This controls what kind of perspective projection Hugin uses for the final panorama, and as you’ll see, there are many options. It’s worth experimenting with them to see what they look like, although Equirectangular is a good default choice. Rectilinear, incidentally, is the same as WoW’s default camera, and most real-world camera lenses.
The Move/Drag tab allows you to change where your virtual camera is pointing, and the Crop tab, as its name suggests, lets you adjust the shape of the panorama.
Once you’re happy with how it looks in the preview, save your work. Just in case.
Step 4: create the final pano
This is a simple step. Just click this button:

Again Hugin will work its magic, and again it takes a while, but assuming it all goes well you’ll end up with a nice panorama with no weird stitching errors!
That’s all there is to it really – once you know the procedure, it’s fairly straightforward, but it lets you create images that just aren’t possible with a straight screenshot.
No comments
Write a comment: